411 Candy Apple Recipe for Perfect Fall Treats
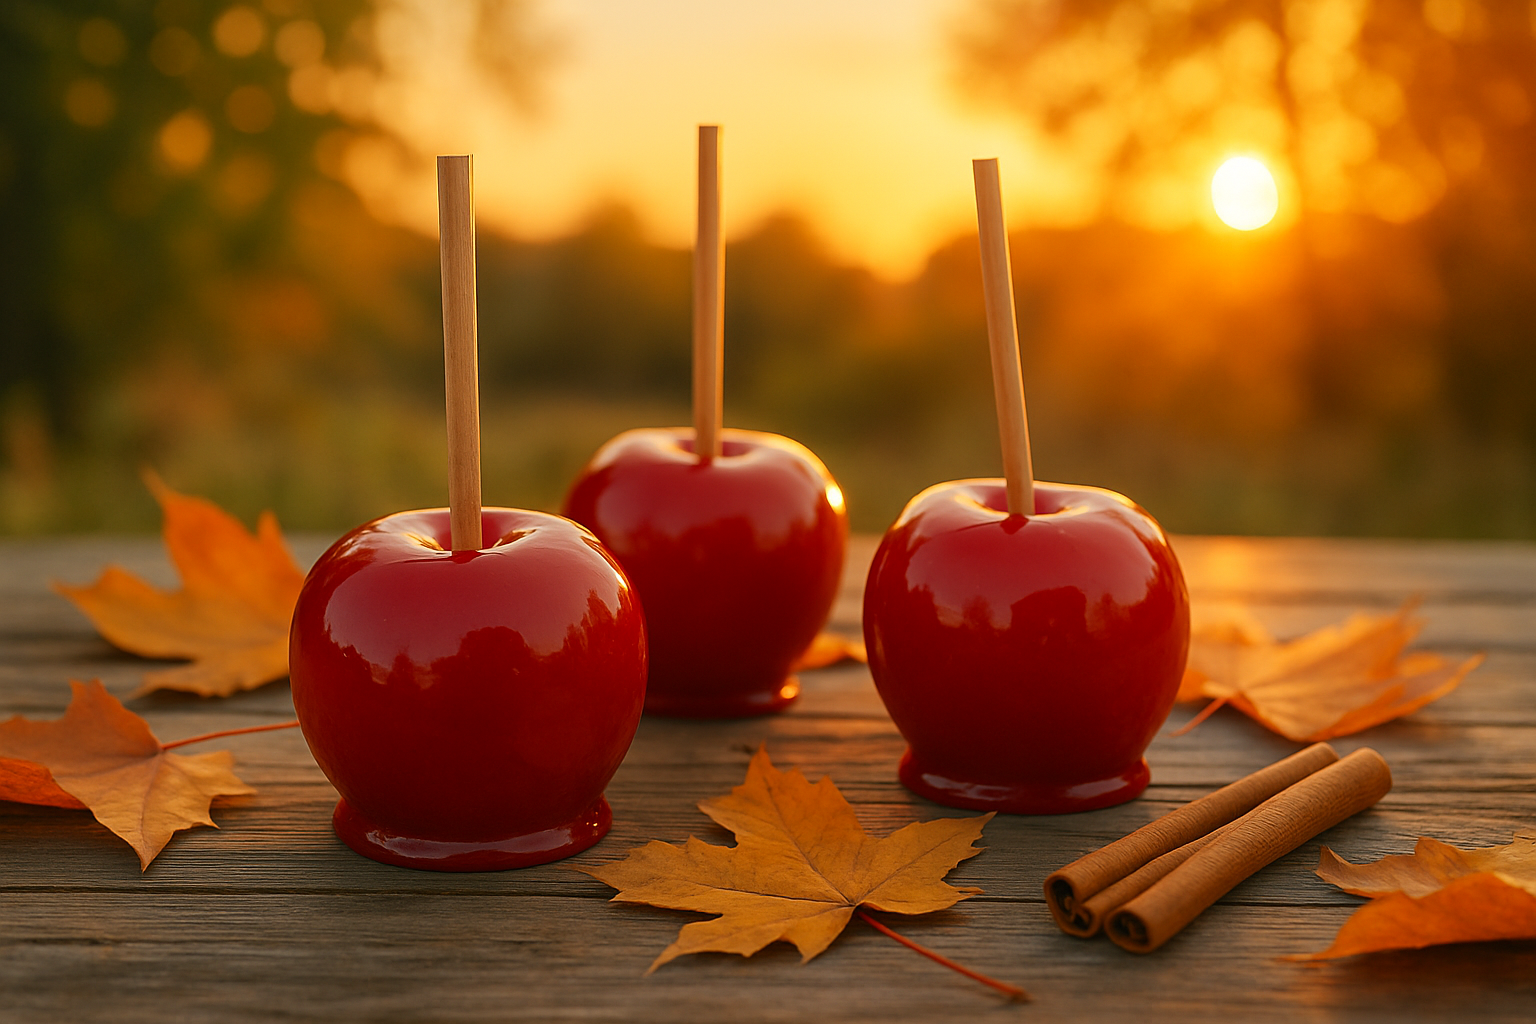
Looking for the 411 candy apple recipe? These timeless fall treats never go out of style, adored for their glossy sweet shell and satisfying crunch you cannot resist. Whipping them up at home is pure magic and the perfect way to try all kinds of flavors and toppings.
Essential Ingredients and Handy Tools for Whipping Up the 411 Candy Apple Recipe
For candy apples that nail the perfect balance between a crisp juicy apple and a satisfyingly hard candy shell, you’ll want to start with fresh firm apples paired with just the right candy coating ingredients.
- Pick crisp firm apples like Granny Smith, Fuji or Honeycrisp to nail that perfect crunchy texture
- Use good old granulated white sugar as the trusty base for your candy coating
- Stir in a splash of light corn syrup to keep things smooth and prevent pesky crystallization while giving your candy that irresistible glossy finish
- Add some water to help dissolve the sugar and whip up a nice syrup
- Toss in red food coloring to get that unmistakable classic candy apple glow
- Jazz things up with flavor boosters like cinnamon or a hint of vanilla extract for your own personal twist
- Grab sturdy wooden or bamboo sticks—these babies need to hold the apple’s weight without wobbling
- Optional extras like chopped nuts, sprinkles, crushed cookies or a sprinkle of sea salt flakes can really kick the flavor and texture up a notch
- Set your apples on parchment paper or silicone baking mats so they can harden without sticking and ruining your masterpiece
You’ll want a few key kitchen tools on hand—think a trusty candy thermometer to keep a sharp eye on the syrup’s temperature, a sturdy medium saucepan to handle the candy coating and strong wooden sticks to hold those apples steady.
Step-by-Step Guide to Whipping Up Your Own Candy Apples
Getting a flawless candy apple begins with prepping the apple just right. Giving it a good wash scrubs away wax and any stubborn residues that could play spoilsport by preventing the candy coating from sticking properly.
Pick out firm, fresh apples that are free from bruises or blemishes—nothing ruins a crisp bite like a soft spot.
Give the apples a good rinse under warm water and gently scrub them with a dish brush to whisk away any stubborn wax or dirt lurking on the skin.
Dry each apple thoroughly with clean towels—leftover moisture is a sneaky troublemaker when dipping.
Carefully insert wooden sticks into the core from the stem end, pushing them about halfway in so the apples stay steady and don’t throw a wobble party while you dip.
Cooking the candy coating is a bit of a delicate dance—you’ve got to keep a close watch on the temperature to hit that perfect hard crack stage, so the candy sets just right without a hitch.
Grab a medium saucepan and set it over medium heat. Toss in the granulated sugar, corn syrup and water, stirring gently until the sugar has melted completely.
Clip a candy thermometer onto the side of the pan making sure it’s snug but not touching the bottom.
Let the mixture do its thing and boil without stirring until it hits 300°F (150°C), also known as the hard crack stage.
Once it reaches that key temp, pull the pan off the heat immediately to avoid any scorched disaster.
Quickly stir in your red food coloring and whatever flavorings float your boat—cinnamon or vanilla extract—before you start dipping. Fast hands here save the day!
Dipping the apples calls for a steady hand and the right timing to nail a smooth and even coating. When the syrup cools to perfection it clings nicely and turns into a glossy crackling shell that is almost too pretty to bite.
- Let the syrup cool just enough so it’s still nice and fluid for a smooth, glossy coating—around 290°F (143°C) does the trick.
- Take your time dipping each apple individually, turning it slowly to make sure the syrup hugs every inch evenly.
- Give the apple a quick tilt right after dipping to let any extra syrup drip off—this helps avoid those annoying thick spots.
- Place the dipped apples upright on parchment paper and let them firm up, making sure they don’t stick or lose their perfect shape along the way.
If you are feeling a bit adventurous and want to jazz things up with optional toppings like nuts or sprinkles, sprinkle them on right after dipping while the coating is still delightfully sticky. Then, let those candy apples hang out and firm up at room temperature for at least 30 minutes before diving in or packing them up.
Helpful Tips to Whip Up Perfect Candy Apples Every Single Time
Candy apples can be a bit of a slippery slope even for seasoned cooks but getting a handle on the usual hiccups can save you from frustration. Dodge sticky coatings, wrinkled apples and burnt syrup with simple tips that keep your candy apples looking as good as they taste
- To keep candy from crystallizing, it is best to resist the urge to stir once the syrup starts boiling. This is tougher than it sounds, and adding a splash of corn syrup really helps keep those pesky crystals at bay.
- Make sure your thermometer is spot-on accurate because hitting the hard crack stage just right gives you that perfectly crisp, crunchy shell that snaps delightfully with every bite.
- Use fresh, cold apples since these help prevent wrinkling or those annoying soft spots that can sneak in under the candy coating.
- If you are feeling adventurous, try coating apples with caramel or melted chocolate for a richer and more indulgent twist on the classic candy apple we all know and love.
Making candy apples at home is easier than you might think — with a little patience and a touch of care, you can whip up one of fall's classic treats that is fresh and just right every single time.
Common Questions About the 411 on the Candy Apple Recipe
How to Store and Serve Your Candy Apples Like a Pro
When following the 411 candy apple recipe, keeping your treats fresh and crisp is all about storing them the right way once they're made. I've found the trick lies in managing temperature and moisture just so—enough to keep that glossy candy shell from getting sticky and the apples from losing their satisfying crunch.
- Let those candy apples cool completely before packing them up because you don’t want any sneaky condensation causing a sticky mess.
- Wrap each apple individually in wax paper or cellophane to keep that shiny candy coating perfectly intact.
- Store the apples somewhere cool and dry or loosely cover them in the fridge. Avoid airtight containers as they tend to trap moisture, which nobody wants for these treats.
- For the absolute best taste and texture, aim to serve candy apples within 3 to 5 days especially if you’re hosting fall parties or casual get-togethers where they’re bound to disappear fast.